
If I had to identify hurdles to the install, I would say they all revolve around the amount of time it took me to physically install SSDs into the ESX Hosts. My ESX hosts are three Dell PowerEdge R620s – two of them use the H710 PERC Raid Controller, while the third uses an H310 PERC Raid Controller. We chose to use Crucial M500 240G SSD drives over any other option.
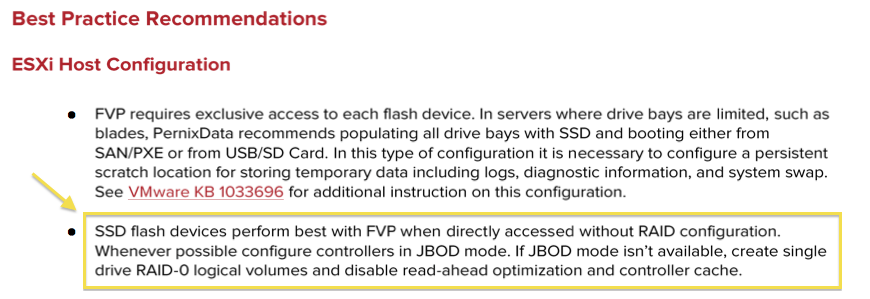
My difficulties during the install were all minor and did not have anything to do with PernixData at all. The first hurdle I stumbled onto was that the SSDs were installed in their drive cradles upside down. Not a big deal, unscrew them, flip them over, screw them back in, reinsert into server. The second issue I ran into was that there did not seem to be an option to disable “controller cache” within the RAID controller. This is a best practice suggestion from the PernixData Install guide. I feel that I spent more time than I should have trying to identify an option to turn this off. Alas, I and another co-worker did not locate one — hopefully this won’t cause any issues down the road.
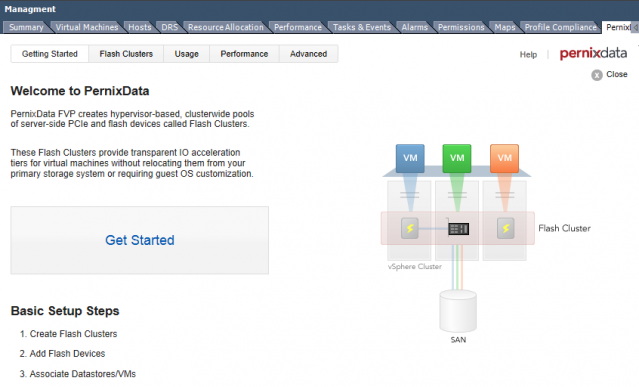
Eric Shanks wrote a really good detailed article about his install. I followed it and the Install Guide that was provided for my installation. It really is a “Next, Next, Next, Finish” process. Once the software was installed, configuration was mere minutes. There is a 5-Step Guided Process that walks you right through it. You are presented with a few choices that you will need to make — depending on what you are trying to test.
The choices I had to make were:
On a side note, a VM can have multiple acceleration associations on it (ie., Write-Back & Write-Through) depending on if you have chosen to accelerate a VM and a Datastore it resides in. If a VM has multiple associations, the VM will trump the other selection.
For my lab and this evaluation, I chose to accelerate all VMs within all active 3PAR datastores using the “Write-Back Policy”. From what I’ve read, this is better for performance. I can adjust or change my selection on the fly.
The install completes with adding the plugin to your local VI Client. With the plugin, you can view the setup, configuration and usage statistics — as well as modify any that need to be changed.
I did notice afterwards that the PSP was changed to a custom Pernix PSP module. 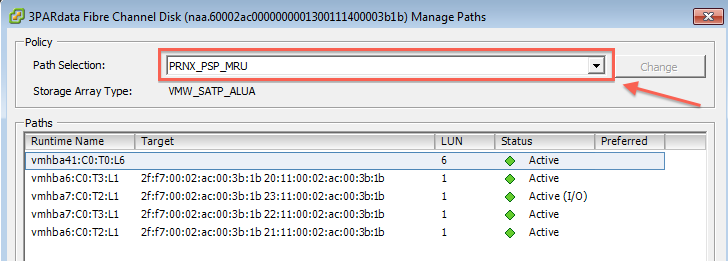 I noticed that this was changed across the board on all datastores — whether the datastore is accelerated or not. I want to look into this, as I’m not sure that I want the PSP changed for datastores I don’t intend on accelerating. In this lab environment, I have an EqualLogic array and 3PAR array that is attached for various projects. I don’t want to accelerate the EQ datastores, and I’m hoping the the PSP change from the EQ memkit to the Pernix module doesn’t hose something up. Again, something to look into.
Lastly, …if I intend on removing this later, PernixData provided detailed Uninstall Instructions within the Install Guide — totally unheard of.
